Today, we went from this:

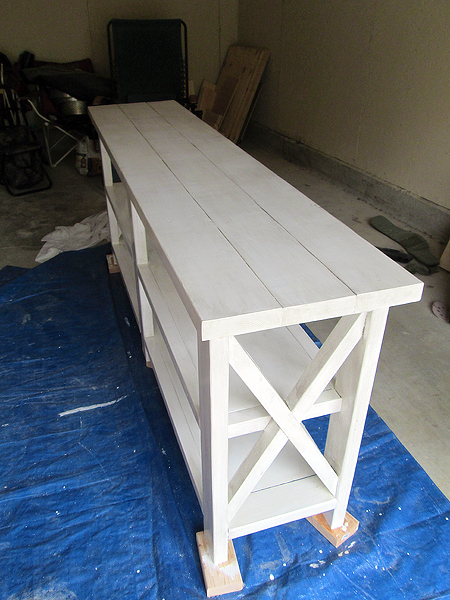
To this:

It’s the Rustic X Console table (again from Ana White) which I had found over a year ago and shoved in Justin’s face, saying “I want this for a TV stand.” That was when he started pricing power tools and buying them for me. Yes, over a year of collecting power tools and purchasing a garage (the monthly fee is hefty) has led to this project. This is the one that started it all.
So if you want to just bask in the pretty before/after, don’t keep reading. Just click away from this post and move on with your life. I’ll see you in my next post! Have a nice day!
… But if you’re curious about the building process, about the pressure I felt about it, about my particular brand of perfectionism, and about a lot of frustration, then by all means, please keep reading. I will try really hard not to be whiny in this post, even though I was whiny during the process.
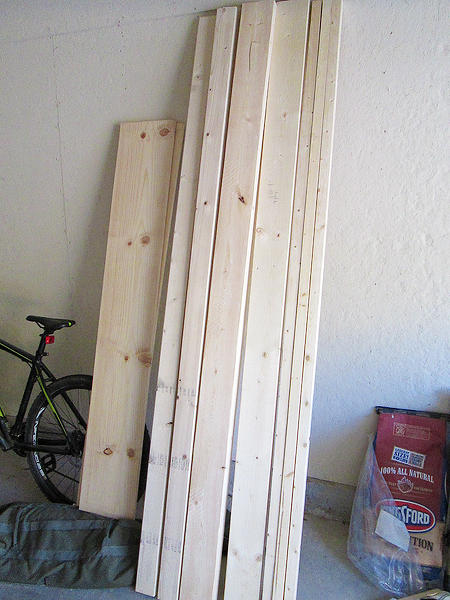
This was a tough one from the very beginning. I was picky about the wood while we were at Home Depot, and at one point, I was completely underneath one of the huge lumber shelves, digging through their selection of 1×2 boards for the least pitted/rough boards. We probably spent a good 45 minutes in the lumber aisle, with me doing all of the digging because that’s literally the only upside to me being so short.
The 2×4’s still weren’t great, though. They had a bunch of staple holes and odd grooves in them that no amount of sanding would get out, but they were the best of the bunch so I grudgingly added them to our supply. I would come to regret that later.

I wanted to do all the miter cuts, and Justin wanted to do all the circular cuts, so that’s how we worked. It took me about half an hour to do all the initial cuts (we saved some boards for angle cuts later) while Justin had to wait for our single power cord before he could cut the bigger boards.
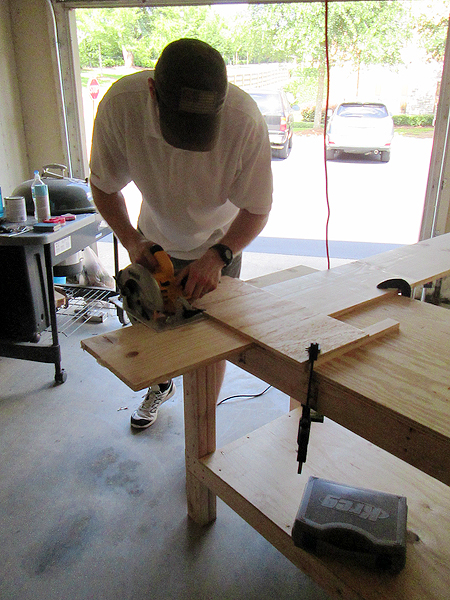
He’s cutting on our second workbench, by the way. It’s still unfinished, because we were too excited to jump on this console table project before he could put the finish on it, but it’ll get done now that we’re taking a bit of a break.
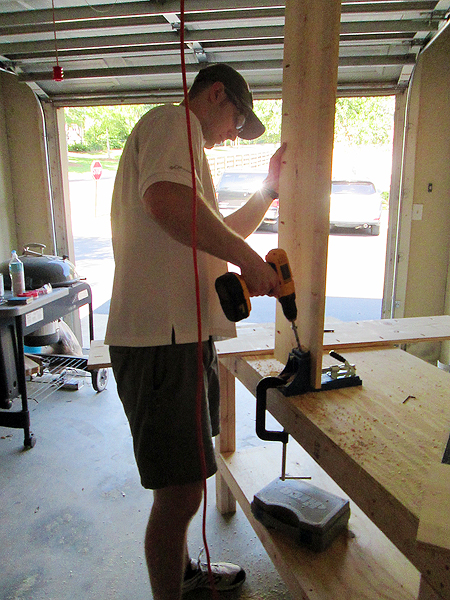
Then it was time for him to drill pocket holes with the Kreg Jig! He was so excited about this, but this was the easy part about pocket holes. More on that in a minute.

Meanwhile, I was sanding e v e r y t h i n g. All of the boards were rough and splintery, and thanks to my refinishing project from last month, I knew that I didn’t want to save my sanding for when the table was assembled — not without a Dremel, at least!Eventually, after hours of work, nearly everything was sanded to my liking.

He was busy assembling as I got boards sanded, and by the end of the first day, we’d gotten one of the frames built.

He was already noticing some problems with the Kreg Jig — namely, that the drill bit is square (instead of Phillips head or star-shaped) and as such, it tends to slip out of the screw heads pretty easily. When you’re trying to tighten a screw that’s deep inside a pocket hole, it’s frustrating when the bit won’t stay.
But we were losing light and we were happy with our progress, even if we didn’t have much to show for it, so we stopped for the night and fired up the grill.

The next day was even hotter. We’re the geniuses who decided to start building furniture in mid-June, so I should stop complaining about the heat.
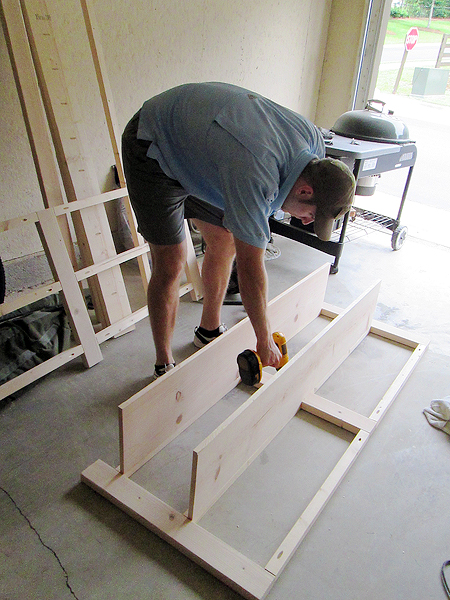
We attached the shelves to one of the frames first.

Then we flipped it and attached the other. This was where the Kreg Jig was a bit of a struggle, because the angles weren’t straightforward anymore, and the slipping bit resulted in some stripped screws and little divots. I’ve read so many glowing reviews about the Kreg Jig and how easy it is to drill pocket holes with it, so I was seriously starting to doubt my favorite bloggers’ transparency when it comes to their products. To be brutally honest, by the time we got the last pocket hole drilled… I was wishing we had just counter-sunk and wood puttied everything. Justin was more ambivalent.

Well okay, he doesn’t look ambivalent here. He was attaching the boards for the top together, again with pocket holes, and then it was time for me to wood putty and sand.

Meanwhile he was attaching the side trim, and that’s when stuff with the Kreg got downright hairy. We couldn’t fit the drill and the long Kreg bit in, so…
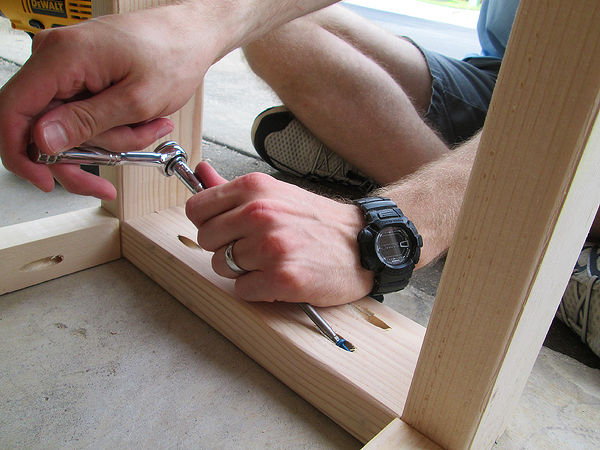
We had to improvise. He was holding the Kreg bit in his left hand and using a socket wrench to turn it. This was not a perfect solution; a couple of the screws poked out from the other side because by hand-cranking it, there was no clutch to stop the screw.
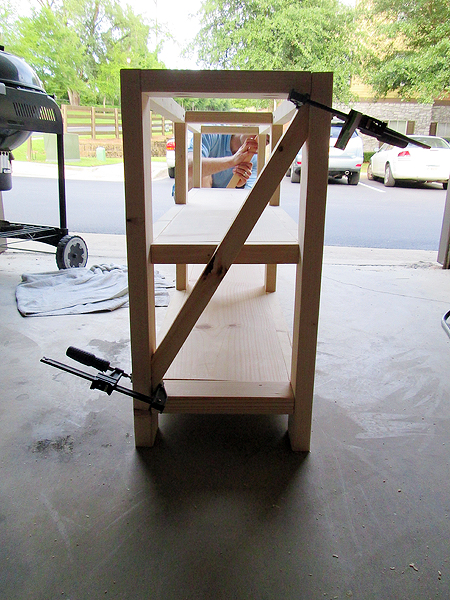
And then it was time for the miter cuts for the X’s on the sides. Our miter saw stops at 50 degrees, and these X’s are 60 degrees. So we basically had to do trial-and-error, pencil marks, and copious sanding to get the X’s to fit. I was not a happy camper that day, we wasted a lot of wood trying to get the X’s to fit just right. We attached them with wood glue and clamped them for good measure.
But! Once the X’s were in and clamped, that was pretty much the end of my whining. Attaching the top was easy.

We simply turned it upside down, measured it to center, then counter-sank screws into the supports along the top. Easy peasy, I did all the screwing myself. (Don’t!)
Then…
It was time for the fun part.

The next day, all by myself, I turned the table right side-up and put it up on scrap 2×4’s so that I wouldn’t have to worry about getting dirt and sawdust on my brush.

We’d gone back to Benjamin Moore and got paint from the Aura line again. This time, I got a satin finish, and I’d narrowed down my choices to three or four off-whites. I didn’t want anything with yellow or green undertones, because (not to put too fine a point on it) my apartment is so beige. I also didn’t want crisp bright white because I am going for a weathered, beachy, coastal look, so starting off with an off-white would already do half the job for me.

In-store, I landed pretty quickly on Distant Gray. It had the perfect undertone of gray instead of blue or purple, and there was definitely no yellow or green anywhere in that can.
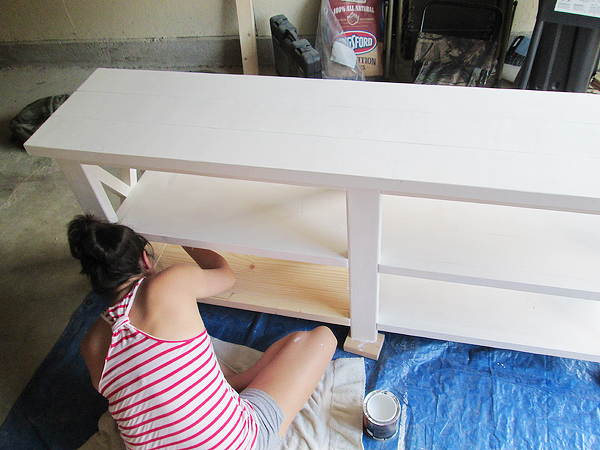
This is how far I’d gotten before Justin woke up and came downstairs. So pretty, right? And the table, too! I put two coats of white on the top sides of the entire table, then let it dry overnight.

The next day, I had Justin help me flip it over this time because I didn’t want to slide it over the fresh paint, and then I painted the bottoms. I didn’t wood putty the pocket holes on the very bottom, because they’re not visible after the fact.
Another entire day of drying, and then it was time for the most stressful part of the entire project.

We went and picked up a new pot of antiquing glaze, because I didn’t like the Java on my slightly-gray table. I was very happy with this antiquing glaze. It was hard work and a bit of an art form, but the color and consistency were perfect.
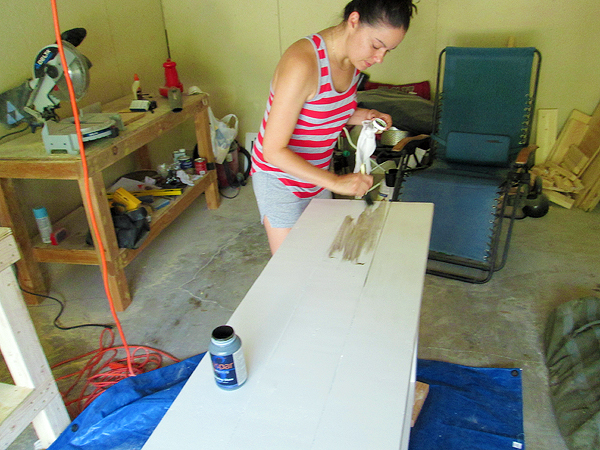
You simply brush it on, get it into the crevices and cracks where you want to simulate aging, and then wipe away the excess. It took me about two hours to do the entire table, and it was a tough process for me, because it felt like I was destroying my pretty paint job. I also felt like I wasn’t adept enough at the process to make it look professional or real.

You can see the doubt on my face, even though the top of it looks pretty fantastic.

The Java glaze had said to apply a coat of polyurethane over the glaze to make it last, so I’d assumed the Valspar version had suggested the same thing. I picked up a can of the satin finish, happy to apply a little more protection to the table, but…
Well, you can’t even really tell in this picture, but the polyurethane gave it a bit of a yellow hue. Turns out the Valspar glaze doesn’t say to apply a top coat, so I could’ve left it uncovered and been happy with it, but on the balance, I think even though I’m not thrilled with a slight yellow hue after all that work to keep it in the grays… I think it’s worth the extra protection.

I did one coat on the entire thing, then a second coat on the top sides of the table and shelves, since those will get a lot of use.

I love the weathered look on the ends especially.

And our janky 2×6’s ended up adding some character to the piece overall, thanks to the antiquing glaze.
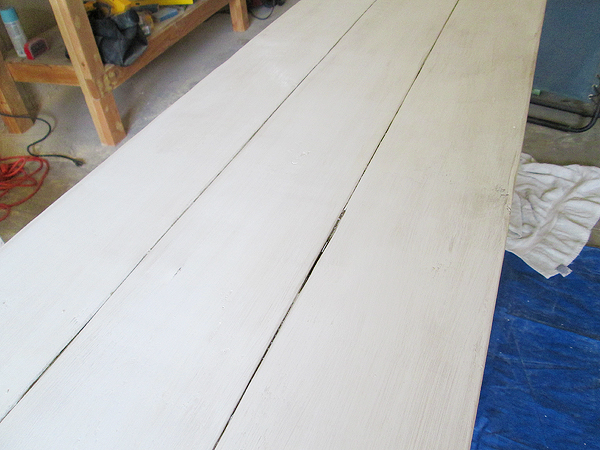
My favorite part, by far, is the seams in the top of the table.
So one last day of drying in the garage, and it was time to take the table upstairs. It’s heavy. And cumbersome. And awesome. And Justin carried it up three flights of stairs all by himself.
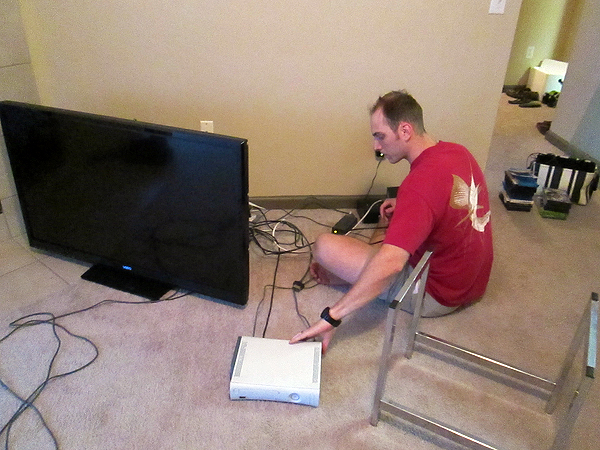
We set it off to the side and went out to dinner with some friends, but as soon as we got home, he cracked open a beer and started the process of untangling our insane cord collection.
I spent a good hour arranging things on the shelves and wrangling those cords into some semblance of order.
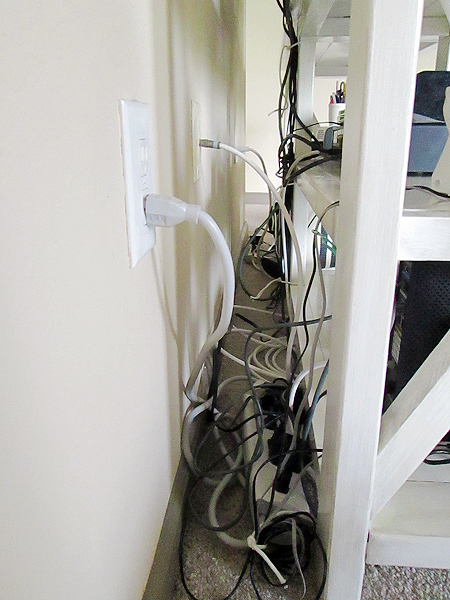
It’s not beautiful, but it’s in order. I used paracord to line the cords and cables along the back legs.

From the front, it looks good!

And I’m glad we spent all that time and effort on those X’s, because they add a nice flair to the sides.
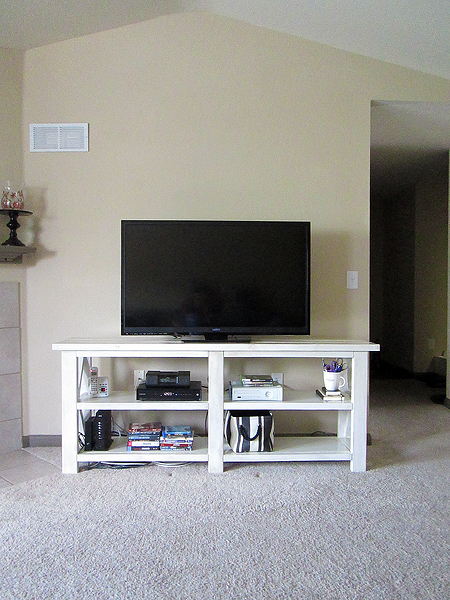
Mostly, I’m glad the TV is on a proper, sturdy stand. This has been a huge step toward making our living room feel like a home instead of a place where we’re squatting for a while. I’m really happy with it, even through all the frustration and doubt.
I learned a lot in this process; mostly, I learned that I shouldn’t be so hard on myself. This is a huge learning curve. In hindsight, it’s pretty great that our end result looks this good, considering it’s only our second building project.
Those shelves aren’t done yet, either. I’m on the hunt for some cute bookends so we can stand up our DVDs (and hopefully bring more in from the box we have stashed in our guest closet!) and hopefully some better lighting to flank the TV, but for now, I’m just happy there’s so much room to work with. Yay!

One thought on “Rustic X Console TV Stand”